|
Hours: |
11am - 11pm EST 1pm-11pm Sat |
| Cell: |
919-614-4297 Cell |
|
eMail: |
Above is to send in orders and Q&A. Below is My Paypal address |

Thank you for visiting Siebert Optics!
Serving Large Observatories and the
Amateur Astronomy Community alike.
200 Short Johnson Road
Clayton, NC
USA 27520
_______________________________
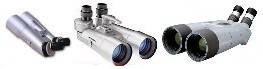
Products:
![]()
![]()
![]()

Eyepieces .965" / 1.25" / 2.0" / 2.7" / 3.0" / 4.0" / 4.3"
Large and Small Binocular Cleaning and Alignment services $99 Call or Email for details.
BT70 RA88 / Miyauchi / Kowa eyepieces
![]()
(Specialized Binoviewer services you can't get anywhere else)


Advanced Barlow Lenses including: Modular and 4 element Telecentric magnification multipliers


1.25" and 2" Advanced Binoviewers From $649-$1999

![]()
Binoviewer OCA's and Accessories
Adapters - Meade Scopes and ETX
![]()

Large and Small Non Illuminated and Illuminated Cross haired eyepieces.
Astrographs/Telescopes


![]()
Special binoviewer services and products you cant get anywhere else
Also can > Click here. And here.
ICP's Image Correction Prisms for Newts
![]()
![]()
![]()
![]()
![]()
Ladies Corner
Non-Astronomy Items
Binoviewer Diopter Instructions.
Proper use of the 2" or 1.25" diopters:
Click on picture for 1.25" binoviewer Image.
Everything in these pictures are the same for all my binoviewers. 2" or 1.25". The eyepieces holders may look different but the operation is the same.
Please watch both Videos below. Although the first video is a 1.25" binoviewer the Self Centering Diopters work the same. The second video (Elite 45mm) reviews and then covers what the other does not.
(Click Here) for the Video for BN 25mm.
(Click Here) for the Video for Elite 45mm. Then Proceed Below if needed..
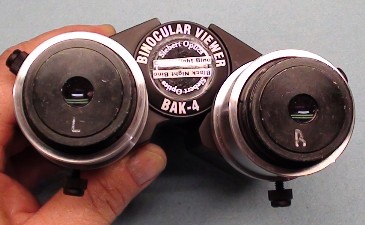
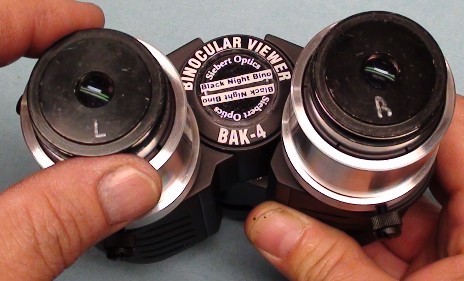
In the photograph above you will see a set of 2" units with double diopters. In the eyepiece sockets are the zero profile self-centering adapters. These adapters eliminate any off-axis eyepieces that normal step down adapters with thumb holddowns would create. Notice the eyepieces are marked L and R. We will use this as a point of reference. The diopters should always be rotated to their lowest position without bottoming them out and only the eyepiece that needs to be raised should be dialed up. This simplifies their use tremendously. Now keep in mind that some eyepieces do not have perfect optical centers and at higher power may appear slightly out of collimation when the eyepieces are rotated at different orientations. Imagine there are two circles with a white dot slightly off center. If you rotate those two dots to their lowest point your eyepiece optical center will then be aligned. But if one is rotated so that the dot is slightly above center and the other is slightly below center the different between the two combined can cause a slight out of collimation (possibly enough to see). So after both diopters are rotated clockwise to their near lowest position and your step-downs and eyepieces are in place, you are now ready to use your diopters. Follow the directions below.

Focus the main focuser on your scope. The object is to determine which eyepiece is focusing in further (left or right?) Simple enough. Once you focus the eyepiece that requires the most intravel the other eyepiece will need to be dialed out slightly. EX. You focus out until you notice the left eyepiece is sharp. If you focus out a little further you will notice the right eyepiece gets sharp. Focus back in until the left gets sharp again. It will be the right side that needs to be dialed out slightly with the diopter. In the illustration above all four holddowns on both sides have been snugged down but are not overly tight. The eyepieces and step-downs are in place and the compression rings are rotated clockwise for proper self-centering. Then you loosen the diopter thumb holddowns on the side you are going to adjust.
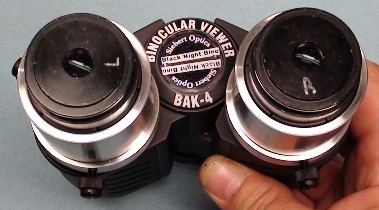
Twisting rotate the diopter. In this case the right focused in the most. So the left needs to be dialed out slightly. After rotating until sharply focused then .....
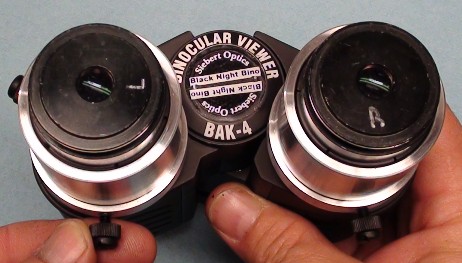
tighten lightly your holddowns. You will notice that the L is now in a different position. If your eyepieces have a good optical center it should not matter. But if you find that you do not get as comfortable a collimation simply ........
rotate the eyepiece back. Now you might say but my eyepieces are not marked. A whiteout pen in a discreet location on the eyepiece will be all that is necessary to mark your eyepiece. Remember that if rotating the eyepiece corrects the problem it will be the difference in the eyepiece optical centers and not the binoviewers themselves. Otherwise rotating the eyepiece would not change a thing. Eyepieces that are purchased from me with binoviewers are always marked for their optimal alignment if needed. Many have suggested they could not see any difference regardless of how the eyepiece(s) was rotated. But this is done for those who are the most sensitive to minute collimation errors and most can completely ignore the marks.
So you may feel as though the above instructions represent an oversimplification of diopter use, but for the few who have a slightly harder time merging images it can make all the difference in the world. If you have standard step-downs with thumb screw holddowns. Always align the holddowns straight up so that the eyepieces are both nudged in the same direction. Below is a little more information for those who may have collimation issues.
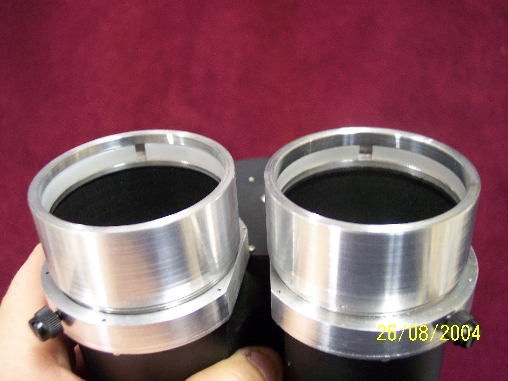
Notice in the above picture the Delrin self-centering inserts. These are of similar design to the Tak Twin-View and the Denkmeier binos. As the outer ring is rotated clockwise it pushes down on the insert. The inserts are pushed down onto a taper that makes the diameter of the ring smaller as it is screwed down. This method works quite well. It only suffers from one problem.
So if you ever have a problem. You may want to refer to this page for the following checklist.
-
1. Only adjust up one diopter for best results.
-
2. Use our self-centering step downs whenever possible with 1.25" eyepieces..
-
3. If you use 3rd party step downs with thumb holddowns make sure they are aiming parallel to each other. Straight up would be best.
-
4. Do not use excessive pressure on the thumb holddowns. Tighten both on each side slightly snug. The holddowns hold nicely. Also do not over-tighten the compression rings on the eyepieces. It is not necessary.
-
5. If collimation issues occur rotate one eyepiece and then the other until merge is achieved. Then simply mark your eyepieces for that orientation for later use.
-
6. You may also try reseating your eyepieces to make sure they are in all the way.
-
7. When using the self-centering step-downs insert the eyepiece in the step-down then install the step-down in the 2" eyepiece holder. The self-centering step-downs are a compression fit and give good comfortable tension to a broad range of 1.25" eyepieces with varying tolerances. Simply plug the eyepiece in and the insert will allow the eyepiece to seat fully with minor pressure. Then put the step-down into the 2" eyepiece holder seated fully. Tighten down snug but not tight.
If you have any questions please email or call me at 1-919-553-3980. I will be glad to walk you through and answer any of your questions.
|
All listed products come with a 30-day money-back guarantee* unless otherwise stated. Specialty order items are not refundable (items made specifically for you). We
welcome |
We accept Visa, Mastercard, Discover American Express. U.S. Money Orders, and Personal Checks (held 10 working days for clearing). Online payments may be made securely through
|
![]()